Adobe Photoshop
Adobe Photoshop File Info
Download the PDF
View Video Tutorial for Photoshop CS3
View Video Tutorial for Photoshop CS4
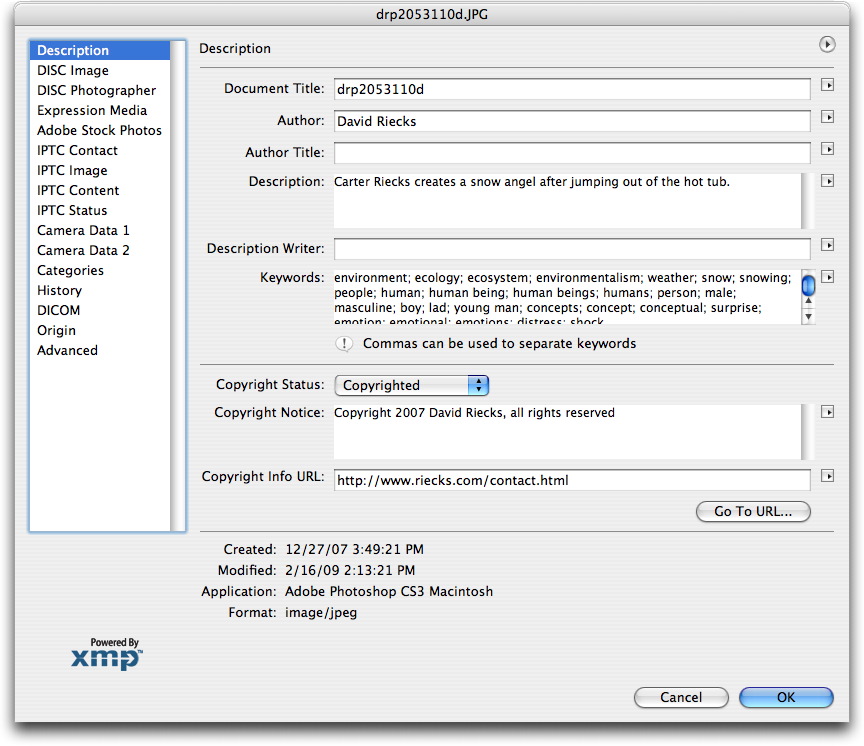
Adding metadata is actually pretty easy, once you understand how to use the various fields. Let's look at how to add metadata to an image with the File>File Info dialogue in Photoshop. Once you have done this, the information travels with the file, wherever it goes.
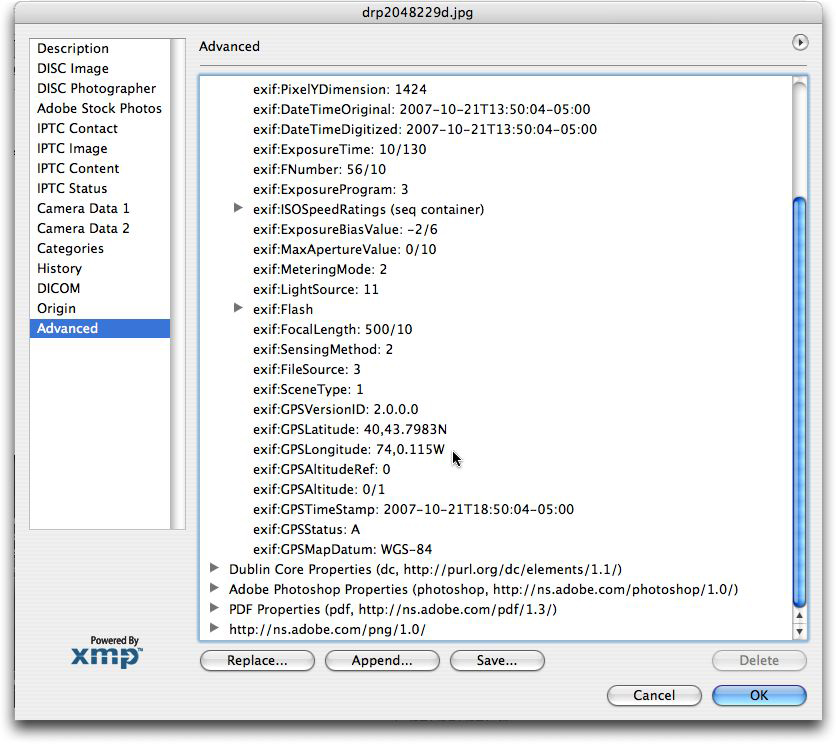
Photoshop and the other Creative Suite applications use a newer style of metadata format called XMP. The XMP platform supports a variety of different metadata types and is built into the applications comprising Adobe Creative Suite. These XMP metadata can be stored within standard image files, but they may also reside in XMP sidecars when adding information to Raw file formats, such as Nikon NEF or Canon CR2 files.
The XMP metadata schema used in Photoshop contains the IPTC Core fields, as well as several others. The important thing about the IPTC Core fields is a large number of other imaging applications support them. Information entered in File Info is also synchronized and stored within images by Photoshop in the older metadata format - the IPTC Information Interchange Model (IIM) - still used by an even larger number of applications.
In Photoshop versions CS through CS3, the File Info dialogue box includes a series of panels accessed by clicking from a list of names at the left side of the dialogue. CS4, instead, has a series of tabs bearing names across the top of the dialogue. For simplicity, we use the term panel. CS4 users should note this refers to tab.
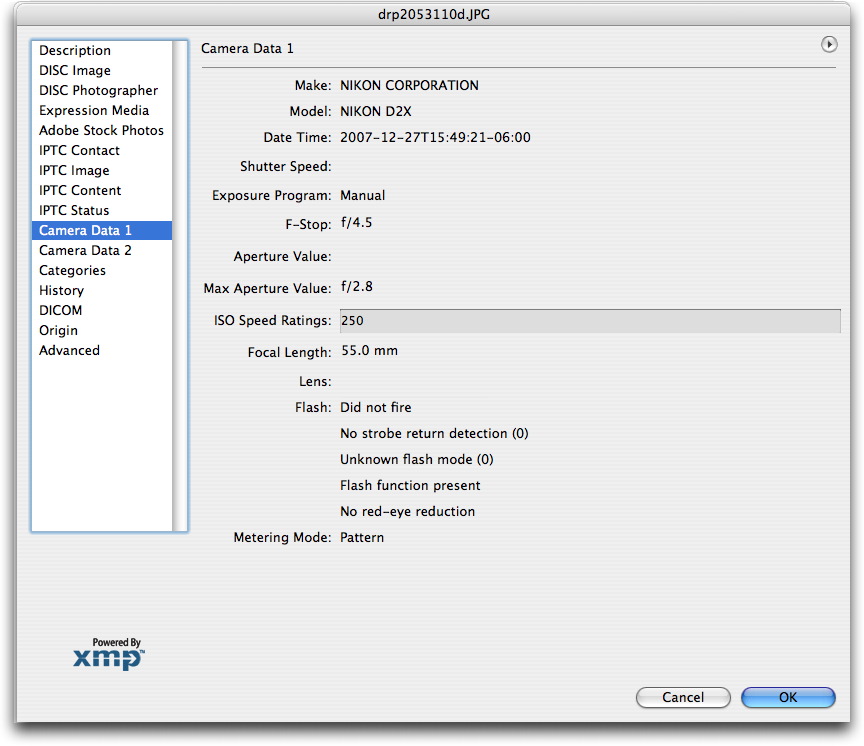
If viewing an image captured with a digital camera, you can click on the Camera Data (1 and 2) panels and see details such as the make and model of camera, aperture, shutter speed settings and more (including latitude and longitude in cameras equipped with or connected to a GPS device). CS4 has a single Camera Data Tab with the older Camera Data 1 and 2 Sections combined. Digital cameras automatically generate this information each time the shutter releases. They store these data within the Exif (Exchangeable Image File) metadata area of a digital file.
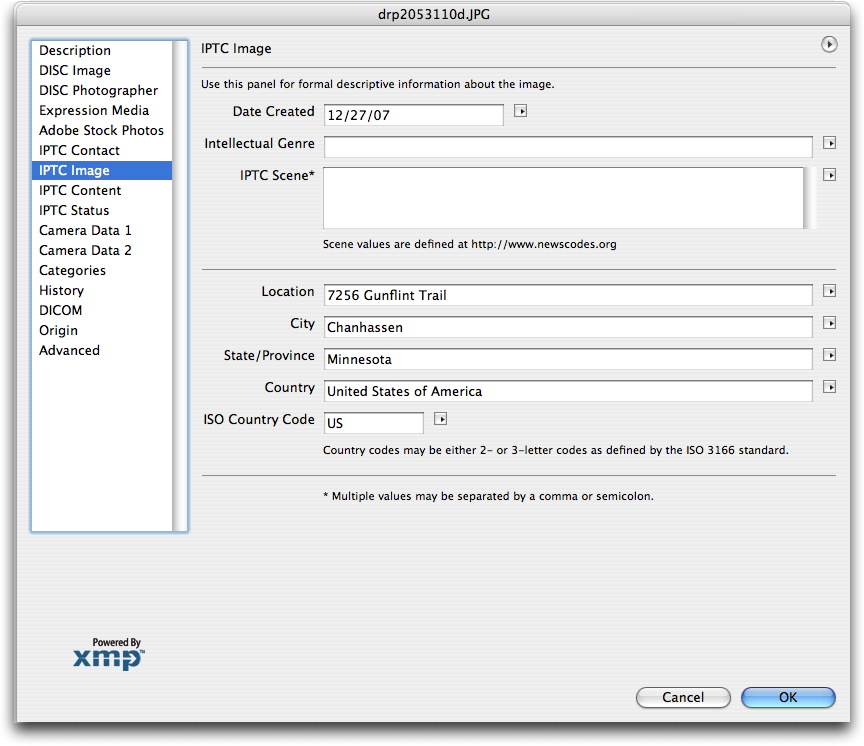
Within the Origin panel, you can list information such as the geographic location (City, State/Province and Country), as well as things such as the Source of the image, how the image should be credited, a headline (a shortened caption) and other specialized instructions. For details on how to populate these fields, see the Guide to Photo Metadata Fields or download the IPTC User's guide.
You might have noticed many fields in the panel display a small black triangle on their right. These are MRU (Most Recently Used) pop-up dialogues and can speed your data entry. When you click on the triangle, you'll see a short list of terms recently typed into the dialogue. Clicking on a value in the list will enter that value in the field, saving the trouble of typing the words and any worry about spelling the words consistently.
After completing the fields you intend to use, click on the OK button to close the File Info dialogue. To add this information to the file, you must also perform a Save or Save As command for that file, or else any new information added will be lost. (Please note you can only access the File Info within Photoshop for embedding information into JPEG, TIFF, and PSD files. If you attempt to open a DNG or Raw file, it will open in Adobe Camera Raw, which processes the file before it opens in Photoshop, where you can access the File Info panel.)
You will find the process of filling out the metadata fields for a number of images to be very repetitive, even tedious, and will soon say to yourself: "There has got to be a better way!" You would be right.